Historical Video Playback
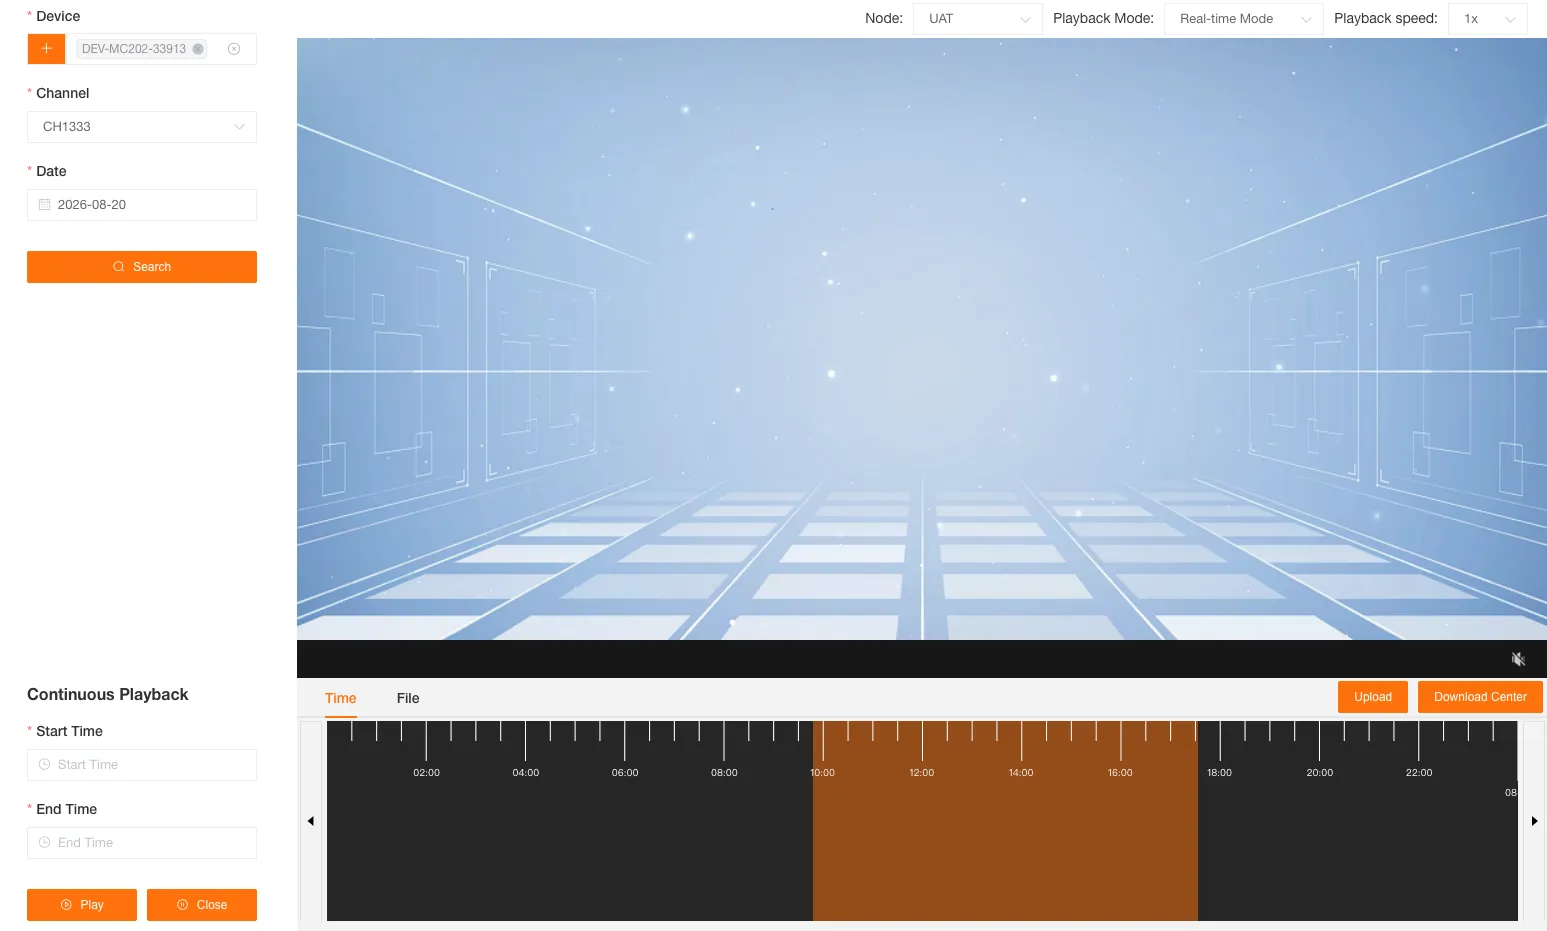
Search for playback by selecting a device, channel, and date. Click on the timeline to watch historical videos stored on the device’s installed TF card.
Playback Settings
Section titled “Playback Settings”Media Server Node
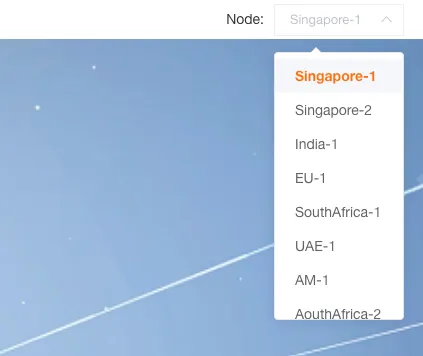
Section titled “Media Server Node”It is recommended to choose a geographically close node for better playback performance. The node selection will be synchronized with your personal settings.
Playback Mode
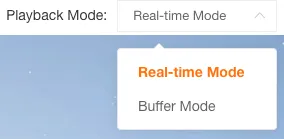
Section titled “Playback Mode”You can choose between Real-time mode and Buffer mode. Real-time mode plays the video from the TF card in real time, while Buffer mode first downloads the video from the TF card locally and plays it while buffering.
Playback Speed
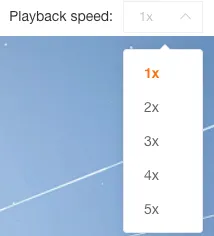
Section titled “Playback Speed”You can set three playback speeds: 0.5x, 1x, and 2x.
Continuous Playback
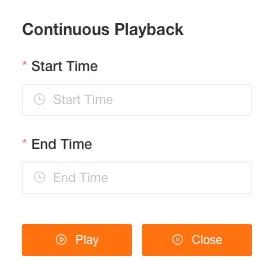
Section titled “Continuous Playback”You can customize the start and end times for playback.
Stop Watching
Section titled “Stop Watching”You can stop watching the current video.

Playback Player
Section titled “Playback Player”Timeline Mode
Section titled “Timeline Mode”Click the light-colored area to play back historical videos from the device.
Click the dark-colored area to play videos that have been uploaded to the cloud.

Video File List Mode
Section titled “Video File List Mode”You can view the device’s historical videos in the video file list.
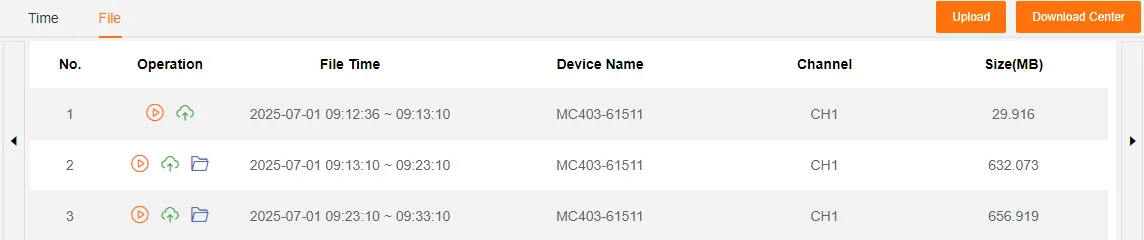
If the video is not uploaded to the cloud, it consumes the device’s data to play the historical video from the device.
If the video has been uploaded, it plays the uploaded video from the cloud without consuming the device’s data, and supports simultaneous multi-channel playback.
Switch Date
Section titled “Switch Date”You can quickly switch to the previous or next day.
Upload
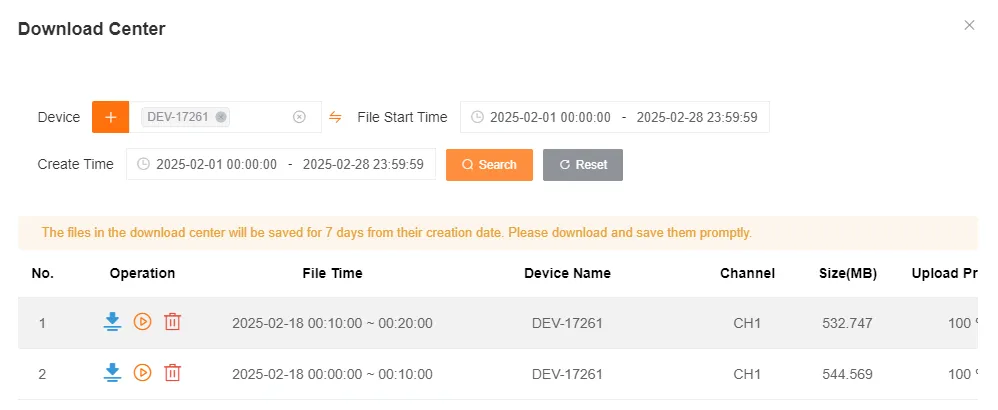
Section titled “Upload”You can easily upload historical videos to the cloud. After uploading, you can check the progress in the Download Center at any time. Videos uploaded to the cloud will be saved for 7 days, so please download them promptly.
Upload Method Selection
Section titled “Upload Method Selection”We provide two convenient upload methods for you to choose from based on your needs:
| Upload Method | Scenario | Features |
|---|---|---|
| Cross-File Upload | When no specific file is selected | Select time range across multiple video files, suitable for large-scale uploads |
| Single-File Upload | When a specific file is selected | Select only within the file’s time range, supports quick duration buttons, suitable for precise positioning |
The main difference between the two methods lies in the selection range and operation mode. You can choose the appropriate upload method according to your needs.
Method 1: Cross-File Upload (Normal Upload)
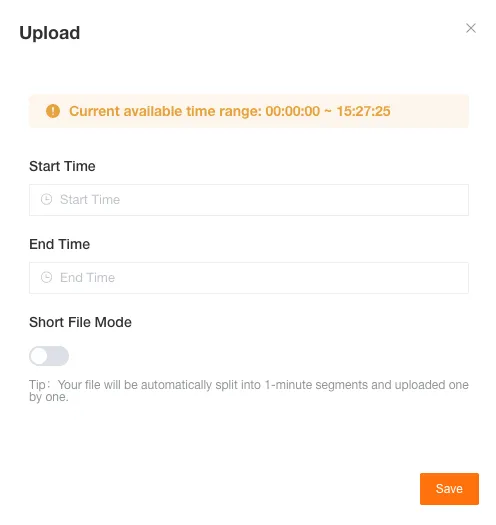
Section titled “Method 1: Cross-File Upload (Normal Upload)”When you haven’t selected a specific video file, you can use the cross-file upload function. This method allows you to freely select an upload time range within all video files of the day, supporting selection across multiple video files. It is very suitable for scenarios where you need to upload a large range of video content.
-
Go to the Historical Video page
First, select an online device, channel number, and date, then click the query button to get the list of historical video files for that day.
-
Open the upload configuration popup
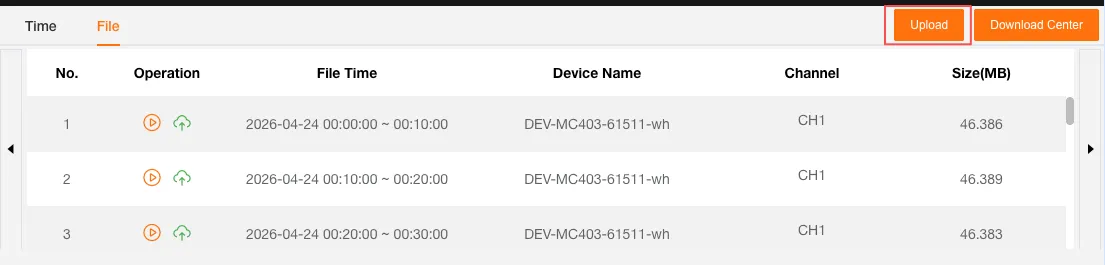
Find the “Upload” button at the top of the page and click it. The system will pop up an upload configuration window.
-
Set the time range
Set the “Start Time” and “End Time” in the popup. You can set them by clicking the time picker or entering manually.
If the video is long, it is recommended to enable “Short File Mode”. The system will automatically split the video into segments of up to 1 minute for upload, which allows for more flexible management and downloading of video segments.
-
Submit the upload
After confirming the time range settings, click the “OK” button to submit the upload request. The upload task will be automatically added to the queue. You can go to the “Download Center” to view the real-time upload progress.
Method 2: Single-File Upload
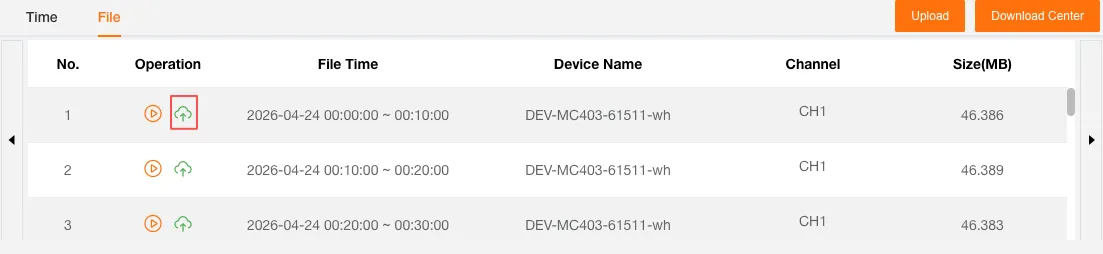
Section titled “Method 2: Single-File Upload”If you want to upload a specific segment of video more precisely, you can use the single-file upload function. First select a specific video file, then you can only select the upload time range within that file’s time range. This method is particularly suitable for precisely locating a video segment for upload.
-
Select a video file
In the video file list on the Historical Video page, click to select the video file you want to upload. After selection, the file will be highlighted to indicate it is selected.
-
Open the upload configuration popup
Click the “Upload” button on the page. The system will pop up an upload configuration window.
-
Set the start time
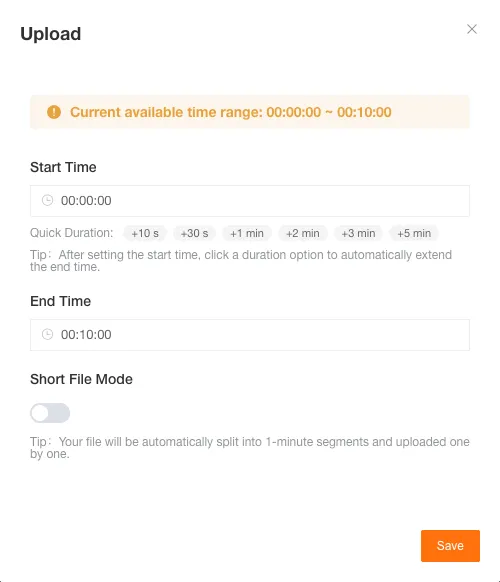
First set the “Start Time” for upload in the popup. You can set it by dragging the timeline or clicking the time picker.
-
Set the end time
Quick Setup: For your convenience in quickly setting the upload duration, the system provides quick duration buttons (+10 seconds, +30 seconds, +1 minute, +2 minutes, +3 minutes, +5 minutes). After clicking, the system will automatically calculate and fill in the end time.
Manual Setup: You can also directly enter the “End Time” manually for more precise time control.
-
Submit the upload
After confirming the settings, click “OK” to submit the upload request, then go to the “Download Center” to check the upload progress.
Quick Duration Buttons
Section titled “Quick Duration Buttons”To facilitate quick setting of upload duration, the system provides the following quick buttons:
| Button | Duration | Description |
|---|---|---|
| +10s | 10 seconds | Suitable for quickly capturing short video clips |
| +30s | 30 seconds | Suitable for capturing short video segments |
| +1min | 60 seconds | Standard video segment duration |
| +2min | 120 seconds | Longer video segment |
| +3min | 180 seconds | Medium-length video |
| +5min | 300 seconds | Commonly used longer video segment (maximum 10 minutes supported) |
After clicking a quick button, the system will automatically calculate and fill in the end time, eliminating the need for manual input and greatly improving operation efficiency.
Download Center
Section titled “Download Center”You can download, play, and delete historical videos uploaded to the cloud, view file time, device name, channel number, size, upload progress, creation time, and upload time.