Device Detail
Map Features
Section titled “Map Features”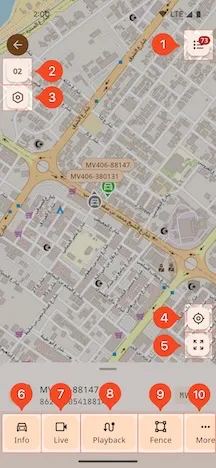
1. Activated Devices list
Section titled “1. Activated Devices list”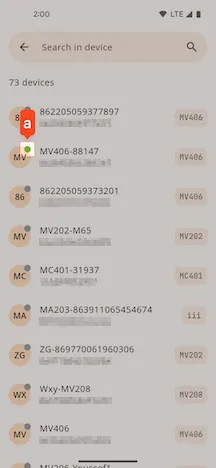
- a. Device online status
2. Auto-Refresh Countdown
Section titled “2. Auto-Refresh Countdown”The map interface automatically refreshes the position and status data of all devices every 10 seconds by default.
3. Map Settings
Section titled “3. Map Settings”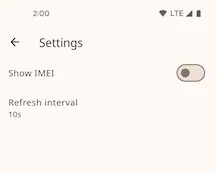
- Show IMEI: Sets whether to display the
IMEInumber on the device’s map marker. - Refresh Interval: Customize the automatic map refresh interval (default is 10 seconds).
4. Locate to Current Position
Section titled “4. Locate to Current Position”Click this button, and the map view will center on the user’s current location.
5. Show All Devices
Section titled “5. Show All Devices”Click this button, and the map will zoom to fit the locations of all devices within a single view.
6. Device Info
Section titled “6. Device Info”View detailed information about the device, including basic info, custom info, activation info, and data usage statistics. For more details, please refer to the Device Info chapter.
7. Live Stream
Section titled “7. Live Stream”For detailed usage of this feature, please refer to the Live Stream chapter.
8. Playback
Section titled “8. Playback”For detailed usage of this feature, please refer to the Playback chapter.
9. Fence
Section titled “9. Fence”For detailed usage of this feature, please refer to the Fence chapter.
10. More
Section titled “10. More”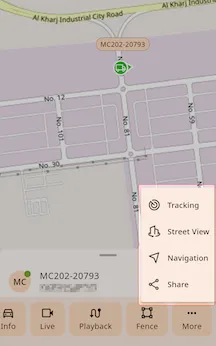
Tracking
Section titled “Tracking”Enter real-time tracking mode, where the map will continuously focus on a single device and display its detailed location information.
![]()
Street View
Section titled “Street View”View the street view image of the device’s current location.

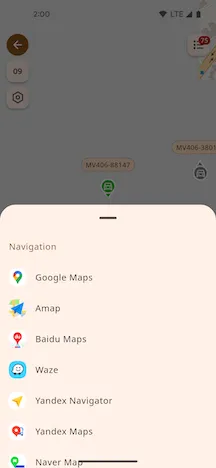
Navigation
Section titled “Navigation”Select and launch a map application on your phone to navigate to the device’s location.
Share the device’s real-time location link through various applications.

Device Action Panel
Section titled “Device Action Panel”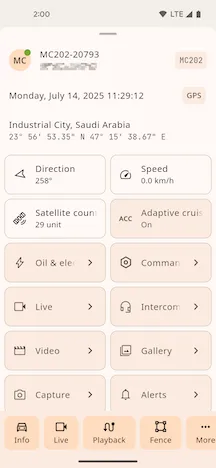
Oil & electricity control
Section titled “Oil & electricity control”Some device models support remote oil and electricity control, allowing you to turn the oil/electric supply on or off.

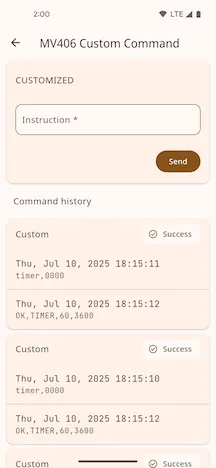
Command
Section titled “Command”This lists all command types supported by the device.
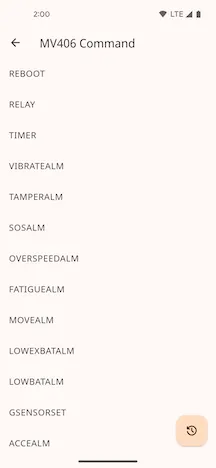
After selecting a specific command type, you can send the command and view the history of sent commands.
For details, please refer to the Live Stream chapter.
Intercom
Section titled “Intercom”Before starting the intercom, you need to select the media server node based on the device’s region.
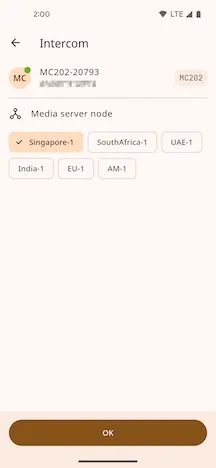
Intercom
- Tap the intercom switch to connect to the device. Once connected, press and hold the button at the bottom to speak, and release to stop.

Query and play historical videos recorded on the device.
Filter Conditions
- Time: Select the date to query.
- Channel: Select the video recording channel.

History Video List
Section titled “History Video List”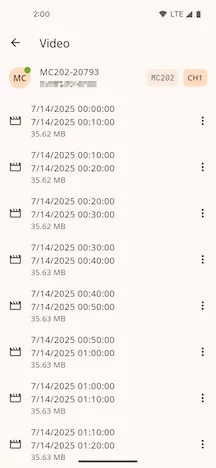
Click the menu button on the right of a video item for the following actions:
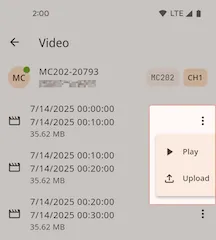
- Play: Play this video clip online.
- Upload: Upload the video file from the device to the server.
Uploaded Video List
Section titled “Uploaded Video List”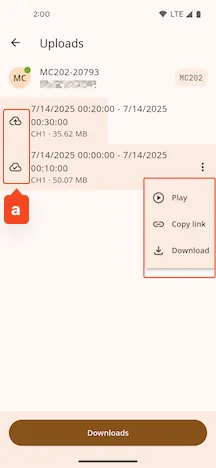
- Status Indicator: An icon (like ‘a’ in the image) and background color are used to visually indicate the video’s upload status and progress.
- Menu Actions: Provides options like
Play,Copy Video Link, andDownload to Phone Gallery. - Download Management: Click to view download history.
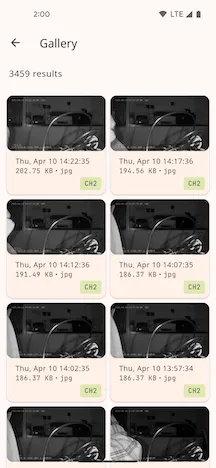
Gallery
Section titled “Gallery”Filter Conditions
- Filter by month
- Filter by time range

The query result list is as follows:
Capture
Section titled “Capture”Send a remote capture command to the device. Before sending, you can select the capture channel and set whether to send a capture notification.

Alerts
Section titled “Alerts”For details, please refer to the Alert files chapter.